Pos : Bloganuary: A Resounding Success!
URL : http://wordpress.com/2022/02/02/bloganuary-a-resounding-success/
Ditulis : 2 Februari 2022 pukul 3:00 pm
Penulis : Mindy Postoff
Tag : Blogging, Community, writing
Kategori : Uncategorized
Even though you can build any type of website on WordPress.com, from an eCommerce store to a photography portfolio, blogs still make up the majority of our 60 million plus sites. To improve interaction and connection with these bloggers, we tried something new: Bloganuary, a writing challenge throughout the month of January, where we provided daily prompts to inspire people to publish blog posts.
Never having run a month long blogging challenge before, we didn't know what to expect. Would bloggers join in? Would the community appreciate this?
But the results were incredible! Thousands of participants joined in from around the world, blogging in different languages. Perhaps what warmed our hearts the most, though, was we got to see first-hand how close our community of global bloggers really is. People liked and commented on shared posts, watched their audiences grow, and followed new sites they didn't previously know about.
But don't just take our word for it. Here's what some of Bloganuary's participants had to say (some grammar edits were made for clarity purposes):
> An excellent initiative. So much variety. I think, "what will I say?" and then come up with something unexpected. Have been on hiatus with my account through some of [the] lockdown. What a great way to get back into the swing of things. Thank you 😊
>
> - Storyteller, artandidioms.com ( https://artandidioms.com/ )
> The #Bloganuary ( https://twitter.com/hashtag/Bloganuary?src=hash&ref_src=twsrc%5Etfw ) blogging challenge has been interesting! I have been writing a different kind of post from the usual - more personal posts. At first I was a little uninspired but have grown into it and am enjoying it (also meeting a diverse group of bloggers!) @wordpressdotcom ( https://twitter.com/wordpressdotcom?ref_src=twsrc%5Etfw )
>
> — Emma Lewis (@Petchary) January 24, 2022 ( https://twitter.com/Petchary/status/1485706751081164805?ref_src=twsrc%5Etfw )
> #bloganuary was a chance for me to actually live in a community where we write, we read what others have to say and perhaps share our stories with each other. Every individual has a distinctive power through which he communicates with others, some by painting, others sing and we…WRITE. The spark of this whole challenge was how one topic can cause ripples in many ways and how many unique perspectives there are in a single topic.
>
> - SaniaDiary, saniadiary.wordpress.com ( https://saniadiary.wordpress.com )
> @wordpressdotcom ( https://twitter.com/wordpressdotcom?ref_src=twsrc%5Etfw ) Thank you for #Bloganuary ( https://twitter.com/hashtag/Bloganuary?src=hash&ref_src=twsrc%5Etfw ) as it's gotten me back into the groove of writing my blog. I was stagnant and struggling bit your daily prompts have me, once again, excited about writing! pic.twitter.com/m8PsHJai3D ( https://t.co/m8PsHJai3D )
>
> — Fiona (@daddiesgrl45) January 27, 2022 ( https://twitter.com/daddiesgrl45/status/1486526297203519490?ref_src=twsrc%5Etfw )
> This is a real challenge, something I have never done before. I normally write a blog every few months but starting in February, I think it will be weekly. I have thoroughly enjoyed #bloganuary so far and intend to go all the way. 🙂
>
> - johnarthurbetts
With such a great response to Bloganuary, we're working to find new ways to engage with our WordPress.com community, so keep an eye out for some new and exciting challenges this year!
And if blogging publicly isn't your preferred way to write, consider the Day One app ( https://dayoneapp.com/ ) , which allows you to journal privately.
--
Kelola Langganan
https://subscribe.wordpress.com/?key=2cf92d447d6bf5230bc38c58c02d8eb0&email=jabatek77.internet%40blogger.com
Berhenti berlangganan:
https://subscribe.wordpress.com/?key=2cf92d447d6bf5230bc38c58c02d8eb0&email=jabatek77.internet%40blogger.com&b=U2Qdo1LnWDh2ouRSBwPz-J-D7rfGf_CoKYwRoZtlONeVNZxdX2UPa-P7MzUXgAU8iTYEwSVz05_t2N5k
Rabu, 02 Februari 2022
Senin, 01 November 2021
[Pos baru] WooCommerce Email Marketing Guide: How to Grow Your Store With MailPoet
Pos : WooCommerce Email Marketing Guide: How to Grow Your Store With MailPoet
URL : http://wordpress.com/2021/11/01/woocommerce-email-marketing-guide-how-to-grow-your-store-with-mailpoet/
Ditulis : 1 November 2021 pukul 1:01 pm
Penulis : The WordPress.com Team
Tag : email marketing, MailPoet, WooCommerce
Kategori : eCommerce
As a WooCommerce store owner, you probably know that email marketing is important. It gives you a chance to connect with your customers on your own terms and without needing to pay for ads on platforms such as Facebook and Google.
But how can you actually get started with email marketing for your WooCommerce store? What types of emails should you be sending? And once you have that knowledge, how can you actually go about sending those emails?
Even if you know that you should be "doing email marketing" for your store, those questions can make it a bit intimidating to get started.
Email marketing doesn't have to be scary, though. With the proper knowledge and tools, you can set up an effective email marketing strategy for your store, all without leaving your WP Admin.
In this post, you'll learn what types of emails your store should be sending. Then, you'll learn how to grow your email lists, send one-off emails, and set up effective WooCommerce email automation strategies using the MailPoet plugin ( https://www.mailpoet.com/ ) .
Let's dig in!
What Types of Marketing Emails Should WooCommerce Stores Send?
When you're talking about WooCommerce email marketing (and eCommerce email marketing in general), there are two broad buckets that your emails can fit into:
One-off email blasts - these are emails that you manually send to some or all of your customers. You might schedule them in advance and you can still set up a sequence of multiple emails, but the key idea is that you're manually choosing when to send each email.
Email automations - these are emails that are automatically triggered by a shopper's actions, such as them purchasing a specific item or abandoning items in their shopping cart. You don't need to manually send these - you just tell your email marketing tool something like "send this email to every person who purchases X product for the first time".
Let's go through both types of emails...
One-Off Email Blasts
One-off email blasts help inform your customers about one-time events such as sales, announcements, new product launches, and so on.
For example, let's say you're running a big holiday sale. Sending an email to all of your shoppers will drive traffic to the sale and, consequently, boost your revenue and sales numbers.
To send this email, you would open up your email marketing tool, write the text, add some visuals, and then send it right away or schedule it in advance.
That is, these types of emails require some manual effort on your part, but that effort is worth it because you can engage your customers and drive traffic to important promotions.
Email Automations
Email automations are emails that your store automatically sends based on a user's actions.
These types of emails can offer an excellent return on investment (ROI) because of that automation. Once you set up your automation sequences, they'll run on autopilot in the background to boost your store's sales.
There are a lot of different ways that you can automate your store's emails, but here are two of the most popular and highest-value automations:
* Abandoned cart reminders
* Post-purchase follow-ups
Abandoned Cart Reminders
An "abandoned cart" is when a shopper adds one or more items to their cart but doesn't complete their purchase.
You'd be surprised by how high this rate is - the Baymard Institute put together numbers from 44 different studies ( https://baymard.com/lists/cart-abandonment-rate ) and found the average cart abandonment rate to be around 70%.
Now, many of these shoppers were never going to make a purchase. But 70% is a large enough number that finding ways to recover even a tiny fraction of those abandoned carts can make a huge improvement to your store's bottom line.
Note - "recover" in this context means convincing the shopper to come back to your store and complete their purchase.
Abandoned cart reminder emails give you a chance to recover those carts by letting you automatically send one or more emails to shoppers who've abandoned their carts.
Typically, you'll want to send these emails in a series. In the first email, you might want to just remind the shopper to check out. In subsequent emails, you can offer a special coupon code to add a little incentive.
And guess what - these automatic emails work pretty well. Klaviyo found ( https://www.klaviyo.com/marketing-resources/abandoned-cart-benchmarks ) that abandoned cart emails can recover 3-5% of abandoned carts on average.
That might not sound like a lot, but let's do the math:
If your store's abandoned cart rate is 70% (the average) and you recover 5% of abandoned carts (at the higher end of average), you just boosted your store's orders by a whopping 12%!
What effect would it have on your store's bottom line if your orders were 12% higher than they are right now? It certainly wouldn't hurt, right?
Even recovering just 3% of abandoned carts would still mean ~7% more orders for your store, which is nothing to sneeze at.
Post-Purchase Follow-Ups
Post-purchase follow-ups are emails that your store automatically sends to a shopper after that shopper makes a purchase. You can use these emails to:
* Boost your sales by encouraging shoppers to place more orders/purchase more items.
* Maintain engagement with your shoppers.
* Help your shoppers get value from the products that they've purchased (which makes them happier and more likely to remain customers).
One common strategy is to send an email after a shopper makes their first purchase at your store. Your goal for this email is to thank the shopper for their purchase and encourage them to make another purchase in the future. Many stores will include a special coupon in this email as an incentive for the shopper to make another purchase.
Another strategy is to send a follow-up email after a shopper purchases a specific product. You could use this opportunity to provide the shopper with information on how to get value from the product, or you could share similar products that you think the shopper might be interested in (or both!).
How to Use MailPoet for WooCommerce Email Marketing
Now that you know the theory behind WooCommerce email marketing, let's get into the next important question - how can you set up these types of email marketing strategies for your WooCommerce store?
To implement everything that we discussed above, you can use the MailPoet WordPress plugin.
MailPoet ( https://www.mailpoet.com/ ) is a full solution for WooCommerce email marketing ( https://www.mailpoet.com/woocommerce-email-marketing ) that lets you manage everything without leaving your WP Admin.
You'll be able to:
* Grow your email lists using forms and/or by letting shoppers opt in during checkout.
* Design your emails using a visual, drag-and-drop interface.
* Segment your customers based on key details such as their lifetime customer value, number of orders, and so on.
* Send one-off email blasts to some or all of your shoppers.
* Set up the types of automation sequences that we discussed above, including built-in functionality for abandoned cart reminders and post-purchase follow-ups.
Once you send your emails, MailPoet will give you detailed analytics on both engagement and the actual revenue that each email drives. This lets you see exactly how effective your email marketing efforts are and make improvements where needed.
MailPoet also includes its own email sending service, which means you can be confident that your emails will make it to your shoppers' inboxes.
In this post, we're focused specifically on using MailPoet for email marketing, but MailPoet also lets you customize your WooCommerce transactional emails and improve their deliverability. If you're interested in those features, we have a separate guide on using MailPoet for WooCommerce transactional emails ( https://wordpress.com/go/ecommerce/customize-woocommerce-transactional-emails/ ) .
MailPoet is 100% free to send unlimited emails to up to 1,000 subscribers. Once your store grows past 1,000 subscribers, MailPoet's paid plans start at $13 per month.
Here's how to use MailPoet to boost your WooCommerce email marketing efforts...
How to Set Up the MailPoet Plugin
To get started, you first need to set up the MailPoet plugin and connect it to your WooCommerce store.
First, install and activate the free MailPoet plugin ( https://www.mailpoet.com/ ) on your site. If you're not sure how to do that, we have a guide to installing WordPress plugins ( https://wordpress.com/go/tutorials/how-to-install-plugins-on-wordpress-com/ ) .
Then, go to the new MailPoet tab in your WP Admin to complete a short setup wizard.
On the first screen, enter your "From Name" and "From Address". Your customers will see these details when they receive emails from your store:
https://wpcom.files.wordpress.com/2021/10/mailpoet-setup-guide-1-1.png Next, you'll get some optional steps, such as enrolling in anonymous usage stats and joining a free course from MailPoet.
When you reach the fourth step, click the button to sign up for MailPoet Premium ( https://account.mailpoet.com/ ) . Again, MailPoet Premium is 100% free to send unlimited emails to up to 1,000 subscribers. You only need to pay when your store grows past 1,000 subscribers:
https://wpcom.files.wordpress.com/2021/10/mailpoet-setup-guide-2-1.png After signing up for MailPoet Premium, you'll receive a license key that you can add to the plugin's settings to connect your account.
In the last step, you can connect MailPoet to your WooCommerce store. If you decide to import your existing customers as subscribed contacts, make sure that they've opted in to receiving marketing emails from you:
https://wpcom.files.wordpress.com/2021/10/mailpoet-setup-guide-3-1.png Now, you're ready to get started with your email marketing efforts!
How to Grow Your Email Lists
Before you can start sending your shoppers marketing emails, you first need to get their permission to send them marketing emails, AKA their "opt in".
MailPoet gives you two main options for growing your list - we recommend employing both strategies in your store.
First off, you can add an opt-in checkbox to the WooCommerce checkout page that gives shoppers the option to opt-in to marketing emails when they're making their purchases:
https://wpcom.files.wordpress.com/2021/10/woocommerce-email-optin-1.jpg To enable this feature in MailPoet, go to MailPoet → Settings in your WP Admin. Then, click on the WooCommerce tab and make sure to check the Opt-in on checkout box. Below that, you can also customize the opt-in message text:
https://wpcom.files.wordpress.com/2021/10/woocommerce-email-optin-2.jpg Second, MailPoet lets you build your own opt-in forms using blocks and the WordPress editor. You can create inline forms, popups, notification bars, and more.
To create a new opt-in form, go to MailPoet → Forms and then click the New Form button. You can choose from one of the pre-made templates or start with a blank form:
https://wpcom.files.wordpress.com/2021/10/woocommerce-email-optin-3.jpg Then, you'll be able to customize your form using the WordPress editor. MailPoet will also show you a welcome video that explains how the editor works:
https://wpcom.files.wordpress.com/2021/10/woocommerce-email-optin-4.jpg How to Segment Your Shoppers
Segmenting your shoppers into different groups can be a great way to optimize your efforts, especially when you're sending one-off email blasts. For example, you might want to send different emails to your loyal shoppers versus people who haven't made a purchase yet.
With MailPoet's built-in segmentation rules, you can easily set up these targeting segments and use them when sending emails.
To create a new segment, go to MailPoet → Lists and then click the New Segment button. You can then use the WooCommerce segment conditions to filter out customers with a minimum total spend, who purchased certain products or types of products, and more:
https://wpcom.files.wordpress.com/2021/10/create-woocommerce-segments.png How to Send Manual Email Blasts
We'll show you how to set up email automation in a second, but first, let's talk about how to manually send one-off email blasts. You can use these to announce sales, share important notifications, launch new products, and more.
To create a new email, go to MailPoet → Emails and then click New Email. For a one-off email blast, you'll want to create a new "Newsletter" email:
https://wpcom.files.wordpress.com/2021/10/manual-email-1.jpg You'll then have the option to choose from one of MailPoet's pre-made email templates or design your own from scratch:
https://wpcom.files.wordpress.com/2021/10/manual-email-2.jpg Once you choose your starting point, you'll be in MailPoet's visual, drag-and-drop email builder. You can…
* Add new content using the content elements.
* Create custom layouts using the column elements.
* Customize the general style of your email.
* Customize the style of individual elements by clicking on them.
You're also able to enter your email's subject line and preview text in this interface:
https://wpcom.files.wordpress.com/2021/10/manual-email-3.jpg Once you're happy with your email's design, click the Next button in the top-right corner.
On the final screen, you can configure some nitty-gritty details about your email:
Lists - choose to send your email to all customers or to specific lists or segments.
Schedule it - you can either send the email right away or schedule it to send at a certain time.
Send and Reply-to - you can customize the contact details for this email.
Google Analytics Campaign - you can link your email to Google Analytics ( https://kb.mailpoet.com/article/187-track-your-newsletters-subscribers-in-google-analytics ) so that you can track it.
When you're ready to send your email, click the button to Send (if sending right away) or Schedule the email:
https://wpcom.files.wordpress.com/2021/10/manual-email-4.jpg If you're not ready to send the email quite yet, you can also save it as a draft so that you can come back to it in the future.
How to Set Up WooCommerce Abandoned Cart Emails
As we discussed above, automatic abandoned cart reminder emails are a great way to try to recover some of your store's abandoned carts.
MailPoet includes a built-in abandoned cart reminder feature that lets you send a single email or a sequence of multiple emails. MailPoet recommends sending three emails in a sequence - you can read about abandoned cart email best practices ( https://www.mailpoet.com/blog/woocommerce-abandoned-cart-emails/ ) if you're interested in learning more.
To get started, go to MailPoet → Emails and click the New Email button. Scroll down to the WooCommerce emails section and click the Set up button for the "Abandoned Shopping Cart" email:
https://wpcom.files.wordpress.com/2021/10/abandoned-cart-reminders-1.png First, you'll choose when to send the email. For the first email, the default of 30 minutes after the last page load is a good starting point:
https://wpcom.files.wordpress.com/2021/10/abandoned-cart-reminders-2.png Next, you can choose one of the special abandoned cart reminder email templates:
https://wpcom.files.wordpress.com/2021/10/abandoned-cart-reminders-3.jpg You can then customize your email using the same visual editor from above. The key detail here is that you get an Abandoned Cart Content element that will automatically insert the items that each shopper abandoned in their cart:
https://wpcom.files.wordpress.com/2021/10/abandoned-cart-reminders-4.jpg On the last screen, you can configure a few final details. When you're ready to activate your automation, click the Activate button:
https://wpcom.files.wordpress.com/2021/10/abandoned-cart-reminders-5.jpg To add more emails to your sequence, you can repeat the same steps. Just make sure to choose a different timing sequence for each email. A good starting point is the following:
First email - 30 minutes after the abandoned cart.
Second email - 24 hours after.
Third email - 72 hours after.
How to Set Up WooCommerce Post-Purchase Follow-Up Emails
Another very useful WooCommerce email marketing strategy is sending post-purchase follow-up emails.
MailPoet lets you send three different types of automated follow-up emails:
First Purchase - your store will send this email after a shopper makes their first purchase, regardless of what product(s) the person bought.
Purchased This Product - your store will send this email to shoppers who purchased a specific product for the first time.
Purchased In This Category - your store will send this email to shoppers who purchased any product in a specific product category for the first time.
For example, one popular strategy to encourage first-time buyers to become repeat customers is to send them a special coupon code after their first purchase. This coupon code encourages them to make a second purchase which hopefully gets them in the habit and converts them into a long-term customer.
To create a post-purchase follow-up email, go to MailPoet → Emails and click the New Email button. Then, choose the type of follow-up that you want to create. For this example, we'll do a "First Purchase" follow-up email:
https://wpcom.files.wordpress.com/2021/10/follow-up-emails-1.jpg On the first page, you can choose the timing of the email. You could send it immediately after the person's first purchase, or you could wait X hours, days, or weeks:
https://wpcom.files.wordpress.com/2021/10/follow-up-emails-2.jpg As with the other types of emails, you can then choose a pre-made template and design it using MailPoet's editor.
https://wpcom.files.wordpress.com/2021/10/follow-up-emails-3.jpg You can edit your sending details and activate the email on the last screen, just like you did for the abandoned cart reminder emails.
And that it's it!
If you'd like to set up other types of post-purchase emails for products or product categories, you can repeat the same steps.
Get Started With WooCommerce Email Marketing Today
WooCommerce email marketing is a great way to connect with your shoppers and boost your store's revenue.
Once you build a list, you can send out one-off blasts to promote one-time events and announcements. Beyond that, you can also set up email automation rules to grow your store on autopilot.
For the easiest way to get started with WooCommerce email marketing, you can use the MailPoet plugin.
MailPoet helps you build your email lists, manage and segment your subscribers, and send one-off or automated marketing emails - all without leaving your WP Admin. You'll also get built-in analytics so that you can see how effective your email marketing efforts are at driving revenue.
If you're ready to get started, install the free MailPoet plugin today ( https://www.mailpoet.com/ ) . And if you want to learn how to use MailPoet to go beyond marketing emails and also improve your store's transactional emails, check out our guide to WooCommerce transactional emails ( https://wordpress.com/go/ecommerce/customize-woocommerce-transactional-emails/ ) .
Finally, if you're still in the early stages of planning your store, click here to learn how the WordPress.com eCommerce plan ( https://wordpress.com/ecommerce/ ) can handle all of the technical details of running a WooCommerce store for you so that you can focus on implementing tactics like email marketing instead of messing around with technology.
--
Kelola Langganan
https://subscribe.wordpress.com/?key=2cf92d447d6bf5230bc38c58c02d8eb0&email=jabatek77.internet%40blogger.com
Berhenti berlangganan:
https://subscribe.wordpress.com/?key=2cf92d447d6bf5230bc38c58c02d8eb0&email=jabatek77.internet%40blogger.com&b=9JXuHt6XX_2e-UTLihhfLIc3oggAU6v2xdCp0_nOl2yeVTR4mx_jAEqPIZB0FTUtVqPYzUUmPtOBCa6dMpFeNEWXZaixP-k7qcx5-TJzQpYa
Jumat, 29 Oktober 2021
[Pos baru] How to Sell a Single Product Online with WordPress
Pos : How to Sell a Single Product Online with WordPress
URL : http://wordpress.com/2021/10/29/sell-a-single-product-online/
Ditulis : 29 Oktober 2021 pukul 1:02 pm
Penulis : The WordPress.com Team
Kategori : eCommerce
There are entire platforms dedicated to helping businesses sell thousands of items. However, if you only want to sell a single product, then these platforms can feel like overkill.
Fortunately, it's easy to sell a single product online with WordPress.com. Let's imagine your restaurant already has a business site, but your patrons are begging you to sell your signature sauce. You want to oblige, but you don't particularly want to spend weeks learning the ins-and-outs of advanced eCommerce software.
In this post, we'll share a quick and easy way to sell a single product online with WordPress.com with a PayPal-ready block. And, if you're not using WordPress.com, you can add the same block with a Jetpack Security or Complete plan ( https://jetpack.com/support/jetpack-blocks/pay-with-paypal/ ) . Let's get started!
How to sell a single product online
There are countless WordPress plugins that promise to transform your site into a complete eCommerce solution ( https://woocommerce.com/ ) . While this is great for building an Amazon-style store, mastering these platforms requires time and effort. This can feel like a lot of work when your entire inventory is a single bottle of sauce.
If you have a single product, then the Pay with PayPal block ( https://wordpress.com/support/pay-with-paypal/ ) may be the ideal solution. You can use this block to add a PayPal payment button to any post or page:
https://wpcom.files.wordpress.com/2021/10/image1-1.png To access this block, you'll need to upgrade to WordPress Premium ( https://wordpress.com/pricing/ ) . This is priced at $8 per month when billed yearly:
https://wpcom.files.wordpress.com/2021/10/image2-1.png To add the PayPal block, navigate to the page or post where you want to add a product. Then, click on the + icon where you want to insert this block. In the subsequent popup, start typing "Pay with PayPal":
https://wpcom.files.wordpress.com/2021/10/image3.png Select this block when it appears. You can now create your Pay with PayPal button by entering some information about your product:
https://wpcom.files.wordpress.com/2021/10/image9.png You'll also need to connect this block to your PayPal account by entering your email address. Then, simply publish this page — and that's it! Visitors can now purchase your special sauce.
Six tips for selling a single product online
Adding a PayPal button to your website is only the first step. You also need to convince visitors to click on that button. With that in mind, here are six tips for selling a single product online.
1. Embrace simplicity
When you only have a single product, you'll want to ensure that the purchasing process is as smooth as possible. This is the key to generating sales.
If you're adding this product to an existing website, then the majority of users may not have shopping on their minds when they pay you a visit. In our secret sauce scenario, people may drop by to check out your restaurant's opening times or read the menu.
When a visitor isn't in the shopping mindset, it's vital that you grab their attention and encourage them to buy. That's difficult to achieve if you're asking them to complete a multi-step purchasing process.
With 403 million active PayPal accounts ( https://www.statista.com/statistics/218493/paypals-total-active-registered-accounts-from-2010/ ) , your customers may already use PayPal. This is a great start, as they can purchase your single product without having to create an account. But, if they don't have an account, they can still check out using a credit card.
To further simplify the customer journey, we recommend providing a clear product description. Your product page should also be prominent and easily accessible. For instance, you can include this page in your site's navigation menu or recurring elements, such as the header or sidebar. You might even feature the product on your homepage.
2. Make shipping easy
The PayPal block doesn't give you the option to add shipping fees at checkout. Instead, you'll need to incorporate these fees into the total cost of your product.
To help drive conversions, we recommend presenting this as free shipping. Almost half of consumers ( https://goshippo.com/blog/slower-delivery-state-of-shipping-2019-survey/ ) prefer stores that waive shipping fees, with over a quarter stating they only purchase from eCommerce sites that offer free shipping.
The 2019 Future of Retail report ( https://www.walkersands.com/resources/the-future-of-retail-2019/ ) also found that 77 percent of customers view free shipping as the most important factor when making purchasing decisions. By building shipping expenses into the total cost of your product, you can streamline the checkout process, while also driving conversions.
When it's time to ship your product, you can purchase shipping labels ( https://www.paypal.com/us/smarthelp/article/FAQ3852 ) through PayPal. You don't even need a special printer.
3. Focus on customer service
Providing a good level of customer support is vital for any business. According to research, 66 percent of customers ( https://go.forrester.com/blogs/16-03-03-your_customers_dont_want_to_call_you_for_support/ ) believe that valuing their time is the most important factor in delivering five-star customer service.
Autoresponders
If you're going to impress, then it's impossible to overestimate the value of a speedy response. Still, smaller businesses may struggle to reply to every single query immediately. Here, it may help to set up auto-responders, using a tool such as MailPoet ( https://wordpress.org/plugins/mailpoet/ ) :
https://wpcom.files.wordpress.com/2021/10/image8.png Chatbots
You can also use a live chatbot for support. Tidio is a popular plugin that provides a fully customizable chatbot widget ( https://wordpress.org/plugins/tidio-live-chat/ ) :
https://wpcom.files.wordpress.com/2021/10/image7.png Support doesn't always have to involve a live representative. 73 percent of customers ( https://d26a57ydsghvgx.cloudfront.net/content/blog/Forrester%20Trends%202016%20The%20Future%20of%20Customer%20Service.pdf ) prefer to use a company's website, rather than seeking out a real-life employee.
Online Resources
For this reason, you may want to populate your site with useful resources including FAQs, blog posts, and tutorials. It's also important to ensure that all of the information on your product page is accurate and helpful, as this can immediately reduce the number of support requests you receive.
4. Feature reviews
Shoppers are 270 percent more likely to purchase ( https://www.digitalmarketingcommunity.com/researches/how-online-reviews-influence-sales-jun-2017-globally-spiegel-research-center/ ) a product that has reviews. When you're selling a single item, a few positive reviews could have a huge impact on your profits.
Today, many businesses send follow-up emails to their customers, requesting a review:
https://wpcom.files.wordpress.com/2021/10/image5a.jpg You might even offer an incentive for leaving feedback, such as a coupon code. Once you've secured these reviews, you can feature them on your product's landing page.
Asking customers for feedback can feel like a gamble. There's always a chance that an unhappy shopper may take you up on the invitation, and leave a negative review.
Although it may seem counterproductive, there's evidence to suggest that the occasional less-than-glowing review may actually be beneficial. Over half of consumers ( https://cdn2.hubspot.net/hubfs/2749863/2019-trustpilot/The%20Critical%20Role%20of%20Reviews%20in%20Internet%20Trust%20(UK)%20-%20final.pdf ) admit that they're more likely to purchase a product that has lots of reviews and an average rating, compared to an item that has a small number of reviews and an excellent rating.
5. Use appealing photos
The old saying is true: a picture is worth a thousand words. Since your customers cannot physically see your product, it's important to provide high-quality images ( https://woocommerce.com/posts/how-to-take-professional-product-photos-top-tips ) .
As a minimum, we recommend taking at least four photos of your product, showing each of its sides. When shooting your photos, it's important to remember that you can always downsize, but you cannot increase the quality further down the line. For this reason, it's always a good idea to capture the highest-quality image that's possible with your camera.
Adding multiple high-resolution images to the same product page can be detrimental to that page's loading times. To show off your product without slowing your site, we recommend using an image compression plugin such as TinyPNG ( https://wordpress.org/plugins/tiny-compress-images/ ) .
6. Reach new customers through marketing
Digital marketing is crucial for getting eyes on your product and converting visitors into paying customers. If you're adding a product to an established website, then you may already have a loyal audience.
You can often convert these existing visitors into paying customers by promoting your product across your established channels. This might involve posting the product on your social accounts.
According to the 2019 Adobe Email Usage Study ( https://www.slideshare.net/adobe/2019-adobe-email-usage-study ) , Americans spend more than five hours checking their emails every single day. If you already have a mailing list, then this is a huge opportunity to promote your special sauce to people who have already expressed an interest in your brand.
If you're new to email marketing, you can create a mailing list using the MailPoet ( https://www.mailpoet.com/ ) plugin. You can also grow your audience and reach new potential customers via advertising. Google Ads ( https://ads.google.com/ ) is one of the most well-known advertising platforms:
https://wpcom.files.wordpress.com/2021/10/image4.png We're also big fans of running advertising campaigns on social media. For example, with a built-in audience of roughly 2.89 billion monthly active users ( https://www.statista.com/statistics/264810/number-of-monthly-active-facebook-users-worldwide/ ) , Facebook represents a huge opportunity to draw attention to your new product.
It only takes one
You don't need thousands of products to make money online. If you're a restaurant, you can branch out into eCommerce by selling something as simple as a bottle of your homemade sauce. Or maybe you just want to sell your CD or a single ticket to an event. No matter the reason you just have one product, you can sell it online with WordPress.com.
--
Kelola Langganan
https://subscribe.wordpress.com/?key=2cf92d447d6bf5230bc38c58c02d8eb0&email=jabatek77.internet%40blogger.com
Berhenti berlangganan:
https://subscribe.wordpress.com/?key=2cf92d447d6bf5230bc38c58c02d8eb0&email=jabatek77.internet%40blogger.com&b=ElnxFzWFvJAacr5AI_wVtQm3A4hQePqoBkizunU_vKugm3qdoYzPr67ZWOJTDhxErS5g9B7yXekSW-cfv9KRAKsb1OB9VcZ8FxwOJKaXVCRkZg%3D%3D
Rabu, 27 Oktober 2021
[Pos baru] How Fantasy Football Fans Can Use WordPress to Turn Knowledge Into Cash
Pos : How Fantasy Football Fans Can Use WordPress to Turn Knowledge Into Cash
URL : http://wordpress.com/2021/10/27/fantasy-football-fans-knowledge-into-cash/
Ditulis : 27 Oktober 2021 pukul 1:01 pm
Penulis : The WordPress.com Team
Tag : Business
Kategori : eCommerce
To some, fantasy football might seem like a new trend or fad that just the most die-hard fans use to quench their thirst for the game. But it actually dates back to the 1960's ( https://www.cbssports.com/fantasy/football/news/fantasy-football-the-history-of-fantasy-football-the-biggest-seasons-and-the-future/ ) , and shows no signs of slowing down.
In 2021 alone, the industry is anticipated to grow almost ten percent to $22.3 billion ( https://www.sportspromedia.com/news/fantasy-sports-global-market-value-2021-nfl-mlb-nba/ ) . By 2025, the number is expected to be north of $38 billion.
A whopping 56 million Americans are set to participate in fantasy sports in 2021, with the majority of that number representing football. This isn't surprising as (according to ESPN) 49% of Americans are NFL fans ( http://espn.go.com/nfl/story/_/id/10350802/poll-indicates-49-percent-americans-pro-football-fans ) , creating the largest sports fan base in the country.
Participants spent upwards of $800 million on fantasy football media products ( https://www.forbes.com/sites/leighsteinberg/2014/08/29/the-fantasy-football-explosion/ ) like television channels, websites, and magazines in 2014. With its continued growth, that number's likely much higher today.
If you have a passion for the game, and a spark of entrepreneurship, there's no reason that you can't claim a portion of those proceeds for yourself. It's the perfect excuse to dive even deeper into what you love.
Making Money from Fantasy Football
If you do turn your passion for fantasy football into a profitable side hustle or small business venture, you certainly won't be the first. The internet abounds with successful fantasy sports sites of every shape and size.
In fact, your first step towards your own site should be to study the most successful fantasy sports entrepreneurs who have gone before you. Take a look at what they've done, or posted. What's gotten the greatest number of views and responses? What topics have elicited the most dialog or positive feedback? Do they have forums? If they do, what are the most popular topics of conversation or information?
Dive as deep as you can into the hearts and minds of your target audience and find out what they're looking for so you can provide it. What kind of help did you wish you had when you got started? What kinds of information is so valuable to your game that you couldn't go without it? Do your friends and fellow players ask you the same kinds of questions over and over again? These are all clues for what you can offer, at scale, to the rest of the world through your own website.
Here are a few things you might consider:
* Are you more interested in covering the NFL, college, or non-U.S. ball?
* What topics will you specialize in: historical data and prediction, player stats, league news, current trends, etc.?
How many hours are you willing to commit each week, and how many posts? (Establishing a schedule that your visitors can trust is vital.)
Whatever niche you choose, commit to it, dedicate yourself to becoming the expert, and understand that consistently staying at the top of your game is essential to gaining traction and growing your following and revenue.
Premium Content
If you're creating the type of content that's bringing readers back to your site day after day, it's time to consider offering a subscription for fans to access your most valuable information. These kinds of subscriptions are most often offered for monthly or yearly periods (you could call this a "season pass!").
As part of their membership, subscribers might also receive a weekly newsletter with a rundown of can't-miss headlines and content. Or, you may want to sell a paid email newsletter ( https://wordpress.com/go/business-and-website-guidance/substack-losing-its-luster-the-future-site-hosted-newsletters/ ) as an add-on or standalone offering.
Premium content might include more advanced information like:
* Successful mathematical team building formulas
* Predictive models
* "As it happens" news that could affect players or teams
* Line-up optimizers
* Actionable advice from seasoned professionals
* Personal Q&A, strategy advice, and real-time guidance during league drafts
* Premium opinion articles
* Weekly player recaps
* Interviews with experts
* Injury reports
If you've built your site on WordPress.com, you can quickly add a premium content section to your site with the Premium Content Block ( https://wordpress.com/support/wordpress-editor/blocks/premium-content-block/ ) . Accept readers' one-time, monthly, or annual payments and allows them to access content from written articles to videos and images.
https://wpcom.files.wordpress.com/2021/10/image1.png Visitors will see options to subscribe or log in when they attempt to view the premium content. And if you've built up a following, subscriptions might just sell themselves.
Payments with PayPal
Millions of people trust PayPal to buy, sell, and send money. And if offering a restricted, premium content area isn't your thing, you can still generate revenue on your site by selling almost any product or one-time service you can think of.
You can quickly add a PayPal button to your WordPress site with the Pay with PayPal block ( https://wordpress.com/support/pay-with-paypal/ ) . Ask followers to book you for one-on-one consultations, real-time guidance during their league's draft, or a 30-minute emergency session to turn around a losing season.
You can even add a payment button across the entire site by putting it in a Widget area like the footer or sidebar. Give a prompt like,
"Winning your league? Say thanks — buy me a cold one!"
Essentially, you set up an opportunity for fans to tip you $5 as a thanks for producing great content. You might be surprised how many fans take you up on the deal.
https://wpcom.files.wordpress.com/2021/10/image2.png Learn more about taking payments on your site with PayPal ( https://wordpress.com/support/pay-with-paypal/ ) .
Note: if you're not using WordPress.com, you can still take advantage of the Pay with PayPal block with some Jetpack plans. ( https://jetpack.com/support/jetpack-blocks/pay-with-paypal/ )
Ad Revenue
You can also sell sponsorships or ads on your site directly. This can be a great option if a reputable company reaches out to you about a partnership. But selling advertising manually can take a lot of work — and probably isn't how you want to spend your time.
That's why one of the most recognized ways of generating income on a blog or website is through the use of third-party ads that pay the site owner each time it's engaged with — viewed or clicked.
The small value of each engagement grows quite quickly when there are thousands of visits each day. And if you do include these kinds of ads on your site, there's not much additional work you'll have to do. Keep attracting interested visitors and watch the ad revenue pile up.
WordPress site owners can make money with advertisements using WordAds ( https://wordpress.com/support/wordads-and-earn/ ) and revenue will be deposited directly into their PayPal account.
WordPress's official advertising program, WordAds features the most current and popular ads from external ad networks like Google, Facebook, AOL, and more.
https://wpcom.files.wordpress.com/2021/10/typadsidebar-1.png Typical ad layout in the sidebar of a web pageMany factors contribute to revenue, including visits to your site and the content itself. WordAd revenue is not earned by the number of direct clicks on an ad.
It's available for WordPress.com sites on the Premium, Business, and eCommerce plans that use a custom domain (for example, yourfantasfootballdomain.com instead of yourfantasyfootballdomain.wordpress.com.) You can opt in to the program by going to My Sites → Tools and clicking the Earn ad revenue button, then clicking the Join WordAds button under the Settings tab.
Note: if you're not using WordPress.com, you can still take advantage of WordAds ( https://wordads.co/ ) with some Jetpack plans.
Affiliate Content
Affiliate content advertising ( https://wordpress.com/support/monetize-your-site/#affiliate-linking ) is the term used for writing or posting content intended to promote a specific product or service, and usually includes a trackable link to the product or sales page being promoted.
For the fantasy football niche, these links might connect your readers to:
* Pay-per-view sports cable sites
* Team gear
* Fantasy football draft kits
* Other related merchandise
Unlike pay-per-click advertising, affiliate advertising only pays you when one of your readers clicks on the link and makes a purchase. That purchase is credited to you through the trackable link, and a portion of the sale is passed along.
Affiliate marketing, when properly presented and targeted, can be a hugely successful method of income generation, providing popular site owners with up to six-figure annual incomes or more.
The key is to find the products or services that will best serve your visitors, and make those benefits as clear as possible to them. You also don't want to include too many affiliate links or visitors will start to feel spammed.
You can include affiliate links on your WordPress.com content page as long as your site meets WordPress's policy that the primary purpose of your blog is to provide original content and is not used solely for advertising purposes (which tends to turn away readers anyway).
One of the easiest and most popular ways of getting started with affiliate advertising is to sign up and participate in Amazon's Affiliate Program. You can read Amazon's support documentation and sign up instructions on adding Amazon Affiliate links to your content ( https://wordpress.com/support/adding-amazon-com-affiliate-links-to-your-wordpress-com-site/ ) .
Turn Fantasy Football into Real Money
Whether you're wanting to start a hobby blog to document your fantasy football experiences, build a world-renowned, expert resource for dedicated fans, or anything in between, WordPress can help you achieve it.
Through innovations like the Block Editor ( https://wordpress.com/support/wordpress-editor/ ) , WordPress continues to refine and perfect the blogging and editing experience. The block editor gives you complete control over your pages, post layouts, and revenue-generating content, allowing you to create visually-stunning blogs that help sell your knowledge.
To some, fantasy football may just be a hobby, but the truth is that you really can generate a significant side income (or even more).Create your site ( https://wordpress.com/create-website/ ) and start building the career of your dreams!
--
Kelola Langganan
https://subscribe.wordpress.com/?key=2cf92d447d6bf5230bc38c58c02d8eb0&email=jabatek77.internet%40blogger.com
Berhenti berlangganan:
https://subscribe.wordpress.com/?key=2cf92d447d6bf5230bc38c58c02d8eb0&email=jabatek77.internet%40blogger.com&b=nKd1xD-k8YbXRIPIxMCGMCLrl43eGGJcXNTKzA0yyL1cMYaEwaUGUUJKd29Obu8nfRNCIKWW7U0uQJ3v7NdbXdXqE5KwlR0uncPZkn5eEOcnIw%3D%3D
Senin, 25 Oktober 2021
[Pos baru] Easily Customize WooCommerce Transactional Emails and Ensure They Get Sent Successfully
Pos : Easily Customize WooCommerce Transactional Emails and Ensure They Get Sent Successfully
URL : http://wordpress.com/2021/10/25/customize-woocommerce-transactional-emails/
Ditulis : 25 Oktober 2021 pukul 1:01 pm
Penulis : The WordPress.com Team
Tag : MailPoet, transactional email, WooCommerce
Kategori : eCommerce
Ever wished that you could customize your WooCommerce store's emails using a visual builder? You probably also hoped you could ensure your customers actually receive them.
If you have a WooCommerce store, your store needs to send a lot of emails for order confirmations, shipment notifications, password resets, and so on.
These are transactional emails and, while they're not especially exciting, they're essential to the functioning of your store.
It's crucial that they make it to your shoppers' inboxes, and it's also important that they reflect your store's branding to create a cohesive design.
In this post, you'll learn how you can improve your WooCommerce store's transactional emails to ensure an excellent experience for your shoppers.
More specifically, you'll learn how to use one simple plugin to customize WooCommerce emails and fix any issues you might be experiencing with WooCommerce emails not sending.
And best of all, all the tactics in this post require zero code or technical knowledge to implement. You'll be able to do everything from a simple, user-friendly dashboard.
Ready to get started? Let's dig in...
Introducing MailPoet: The Easy Solution for WooCommerce Emails
To improve all aspects of your WooCommerce store's emails, you can use MailPoet.
MailPoet ( https://www.mailpoet.com/ ) is a total solution for WooCommerce emails (and WordPress emails in general).
Without leaving your WP Admin, it lets you build email lists, manage your email subscribers, and send your customers emails using a visual, drag-and-drop email builder.
In terms of improving your WooCommerce store's transactional emails, MailPoet has two useful features.
First, it offers an email customizer that lets you customize WooCommerce emails using a visual, drag-and-drop builder like this:
https://wpcom.files.wordpress.com/2021/10/woocommerce-email-customizer-2.png Second, MailPoet has its own built-in email sending service that you can use to deliver all of your store's emails.
We'll talk about why this is important later, but the basic idea here is that this service offers a simple way to fix any issues you're having with WooCommerce emails not sending.
Beyond these two improvements to transactional emails, MailPoet also offers many features to improve your WooCommerce email marketing efforts, including the option to set up email automation ( https://wordpress.com/go/digital-marketing/six-free-wordpress-autoresponder-tools/ ) for abandoned cart reminders, post-purchase follow-ups, and more.
Those types of marketing emails aren't the focus of this post, but we look for a post on using MailPoet for email marketing in the near future if you're interested in learning more.
MailPoet has a free plan that lets you send unlimited emails to up to 1,000 customers, which might be all you need for many WooCommerce stores. If your store outgrows the free plan (that's a great thing!), the paid plans start at €13 per month.
How to Set Up MailPoet on Your WooCommerce Store
In this first section, you'll learn how to set up the MailPoet plugin on your store. Then, in the following two sections, you'll learn how to customize WooCommerce emails and improve their deliverability.
To get started, install the free MailPoet plugin at your WooCommerce store ( https://www.mailpoet.com/ ) . You can read this post to learn how to install WordPress plugins ( https://wordpress.com/go/tutorials/how-to-install-plugins-on-wordpress-com/ ) .
Once you activate the plugin, you can go to the new MailPoet tab in your WP Admin to follow the plugin's short setup wizard.
First, you'll need to enter the "From Name and "From Address" for your store. These are the details that your customers will see when they receive emails from your store:
https://wpcom.files.wordpress.com/2021/10/mailpoet-setup-guide-1.png You'll also get a few optional steps, such as enrolling in a free course from MailPoet or enabling anonymous usage tracking.
In the fourth step, make sure to sign up for MailPoet Premium ( https://account.mailpoet.com/ ) . Despite the name, MailPoet Premium is 100% free if you have fewer than 1,000 customers/subscribers. Once your store grows past 1,000 subscribers, the paid plans start at €13 per month:
https://wpcom.files.wordpress.com/2021/10/mailpoet-setup-guide-2.png Once you sign up for a MailPoet Premium account, you'll get a license key that you can add to MailPoet's settings to connect your account.
On the last step, you'll see a prompt to connect MailPoet to your WooCommerce store. If you want to use MailPoet for email marketing, you'll want to enable both options. Again, we will cover using MailPoet for email marketing in a separate post soon.
https://wpcom.files.wordpress.com/2021/10/mailpoet-setup-guide-3.png How to Customize WooCommerce Emails With MailPoet
Now, it's time to get into the fun stuff - customizing your WooCommerce store's emails!
Here's how it works:
1. Launch the WooCommerce Email Template Editor
Here's how to launch MailPoet's WooCommerce email customizer:
* Go to MailPoet → Settings in your WP Admin.
* Click on the WooCommerce tab.
* Check the box to Use MailPoet to customize WooCommerce emails.
* Click Save Settings.
* Click the Open template editor button to launch the WooCommerce email customizer.
https://wpcom.files.wordpress.com/2021/10/woocommerce-email-customizer-1.png 2. Customize Your WooCommerce Emails
Now, you'll be in MailPoet's visual, drag-and-drop editor.
In this editor, you'll see a live preview of what your actual email will look like. Then, you get a sidebar where you can add new content and customize the style of the content.
You can also use the drop-down at the top to load dummy data for different types of WooCommerce emails, such as processing orders, order completed, and so on.
https://wpcom.files.wordpress.com/2021/10/woocommerce-email-customizer-2-1.png There are three main ways that you can customize the WooCommerce emails:
* You can use the Content elements to add new content to the emails.
* You can use drag-and-drop and the Columns elements to change the layout of your email. For example, you could create a multi-column design.
* You can use the Styles tab to change the colors and typography of your emails.
Let's go through each in detail...
To add new content, all you need to do is drag a content element from the sidebar to the live preview of your email. For example, to add a button to the bottom of your email, you would just drag the Button element to that location.
You can then click on the Button element to open its settings in the sidebar, where you can control its content and design:
https://wpcom.files.wordpress.com/2021/10/woocommerce-email-customizer-3.png Other elements will have different settings. For example, if you add the Image element, you could upload your store's logo image in the sidebar to include it in your emails.
To change the layout of your design, you can drag and drop the elements on the visual preview. To create a new multi-column layout, you can add one of the Columns elements from the sidebar and then drag elements into the columns:
https://lh5.googleusercontent.com/Zp1rQrR0a2efhkjYwjPvQgMfw9IXJFBxIonhFC2iJW3P7RFQYT-I8BEh3TbzscOjI1P0Rtz4Ki2Iy-rVJGzzYgma7vCSOj8X-SAxzWu3gReBQxjjmeoY6MYc_P6LKpJVr58m_OV-=s1600 Finally, to customize the high-level style of your emails, you can use the Styles tab. For example, you could change the primary branding color from purple to blue:
https://wpcom.files.wordpress.com/2021/10/woocommerce-email-customizer-5.png You'll also get style options for any individual elements you might've added, as we showed you above.
3. Save Your Changes to Make Them Live
Once you're happy with the new design of your WooCommerce emails, click the Save button in the bottom-right corner to make them live.
Now, your WooCommerce emails will automatically start using this new design. If you ever want to make changes in the future, you can always come back to this interface.
4. Optional: Customize WooCommerce Email Subjects/Headings
With MailPoet, you can easily customize the design of your WooCommerce emails. However, to customize more technical details such as the email subject and the "Thanks for using [store_name]" message, you can use WooCommerce's settings.
To access these settings, go to WooCommerce → Settings → Emails in your WP Admin. Then, select the specific email that you want to customize by clicking the Manage button:
https://wpcom.files.wordpress.com/2021/10/woocommerce-email-customizer-6.png You'll now be able to customize all of those details for your chosen email:
https://wpcom.files.wordpress.com/2021/10/woocommerce-email-customizer-7.png How to Fix WooCommerce Emails Not Sending With MailPoet
If you're having issues with WooCommerce emails not sending, these issues almost certainly come from how your WordPress site and server are configured to send emails.
Such issues are unlikely on the WordPress.com Business or eCommerce plans ( https://wordpress.com/pricing/ ) because these plans are configured to reliably send out WooCommerce transactional emails ( https://wordpress.com/support/email-and-smtp-plugins/ ) . However, you might encounter these problems on self-hosted WordPress sites.
So - what's going wrong?
Well, by default, most WordPress sites send their transactional emails using a function called wp_mail. This function uses your WordPress site's server to send emails.
However, there are a couple of potential issues with this approach that make it unreliable:
* Your site's server is optimized to host your WordPress site, not to send emails.
* Your site's server lacks more technical authentication methods, which means a lot of email clients will mark these messages as spam.
The solution is to use a dedicated email sending service.
Instead of trying to use your WordPress site's server to send emails, you can configure WordPress and WooCommerce to use a service that's 100% focused on reliably getting emails to your users' inboxes.
There's good news here:
MailPoet includes its own built-in sending service that you can enable with a tick of a box.
Once you enable this service, your site will send all of its WooCommerce emails (and other transactional emails) using MailPoet's optimized sending service.
Here's how to set it up and fix issues with WooCommerce emails not sending...
1. Make Sure You're Using the MailPoet Sending Service
To begin, you'll want to make sure that you're using MailPoet's built-in sending service to send your site's emails. If you followed the MailPoet setup guide, your site should already be configured to use MailPoet, but it never hurts to double-check things.
To check, go to MailPoet → Settings in your WP Admin and then select the Send With tab. Make sure that the MailPoet Sending Service is active:
https://wpcom.files.wordpress.com/2021/10/woocommerce-emails-not-sending-1.png 2. Configure MailPoet to Send Transactional Emails
Next, go to the Advanced tab in the MailPoet settings area.
Find the Send all site's emails with… setting and select the option for "The current sending method - MailPoet sending service (recommended)":
https://wpcom.files.wordpress.com/2021/10/woocommerce-emails-not-sending-2.png Make sure to save your settings.
And that's it! MailPoet will now send all of your store's transactional emails using the MailPoet sending service, which should automatically fix any issues your store has been experiencing with WooCommerce emails not sending.
Improve Your WooCommerce Transactional Emails Today
Your WooCommerce store's transactional emails are important, so you'll want to make sure they match your store's branding and are reliably making it to your customers' email inboxes.
With MailPoet, you can easily customize WooCommerce emails and also fix any issues your store is experiencing with WooCommerce emails not sending.
To customize your store's emails, you can use MailPoet's visual, drag-and-drop builder to:
* Add new content.
* Change the layout of your existing content.
* Customize the colors, typography, and other style details of your emails.
Then, you can also configure MailPoet to send your store's transactional emails with just a few clicks, which will instantly make your emails more reliable and give you the confidence that essential emails will always make it to your shoppers' inboxes.
Here's the really cool thing, though:
MailPoet can handle a lot more than just customizing WooCommerce transactional emails and fixing sending issues - you can also use it to send marketing emails and set up automation strategies such as abandoned cart reminder emails and post-purchase follow-up emails.
If you want to learn more about improving your WooCommerce email marketing with MailPoet, we'll soon share a second post that's 100% dedicated to eCommerce marketing emails.
If you're ready to get started with MailPoet for WooCommerce, head to the MailPoet website ( https://www.mailpoet.com/about-us/ ) to learn more and download the plugin.
Finally, if you're still in the early stages of planning your store, click here to learn how the WordPress.com eCommerce plan ( https://wordpress.com/ecommerce/ ) can handle all of the technical details of running a WooCommerce store for you so that you can focus on growing your business.
--
Kelola Langganan
https://subscribe.wordpress.com/?key=2cf92d447d6bf5230bc38c58c02d8eb0&email=jabatek77.internet%40blogger.com
Berhenti berlangganan:
https://subscribe.wordpress.com/?key=2cf92d447d6bf5230bc38c58c02d8eb0&email=jabatek77.internet%40blogger.com&b=i2_IXMgeKfGX5vVmw7nm_NK-7E7HyrmqIBD3zScnpTwrZSQdPZ6f22F90ULXRMxcR3FjNa3RF0h4sktHB6ru-1vYZwbki1uAAQvbGNf_zYHx
Langganan:
Postingan (Atom)

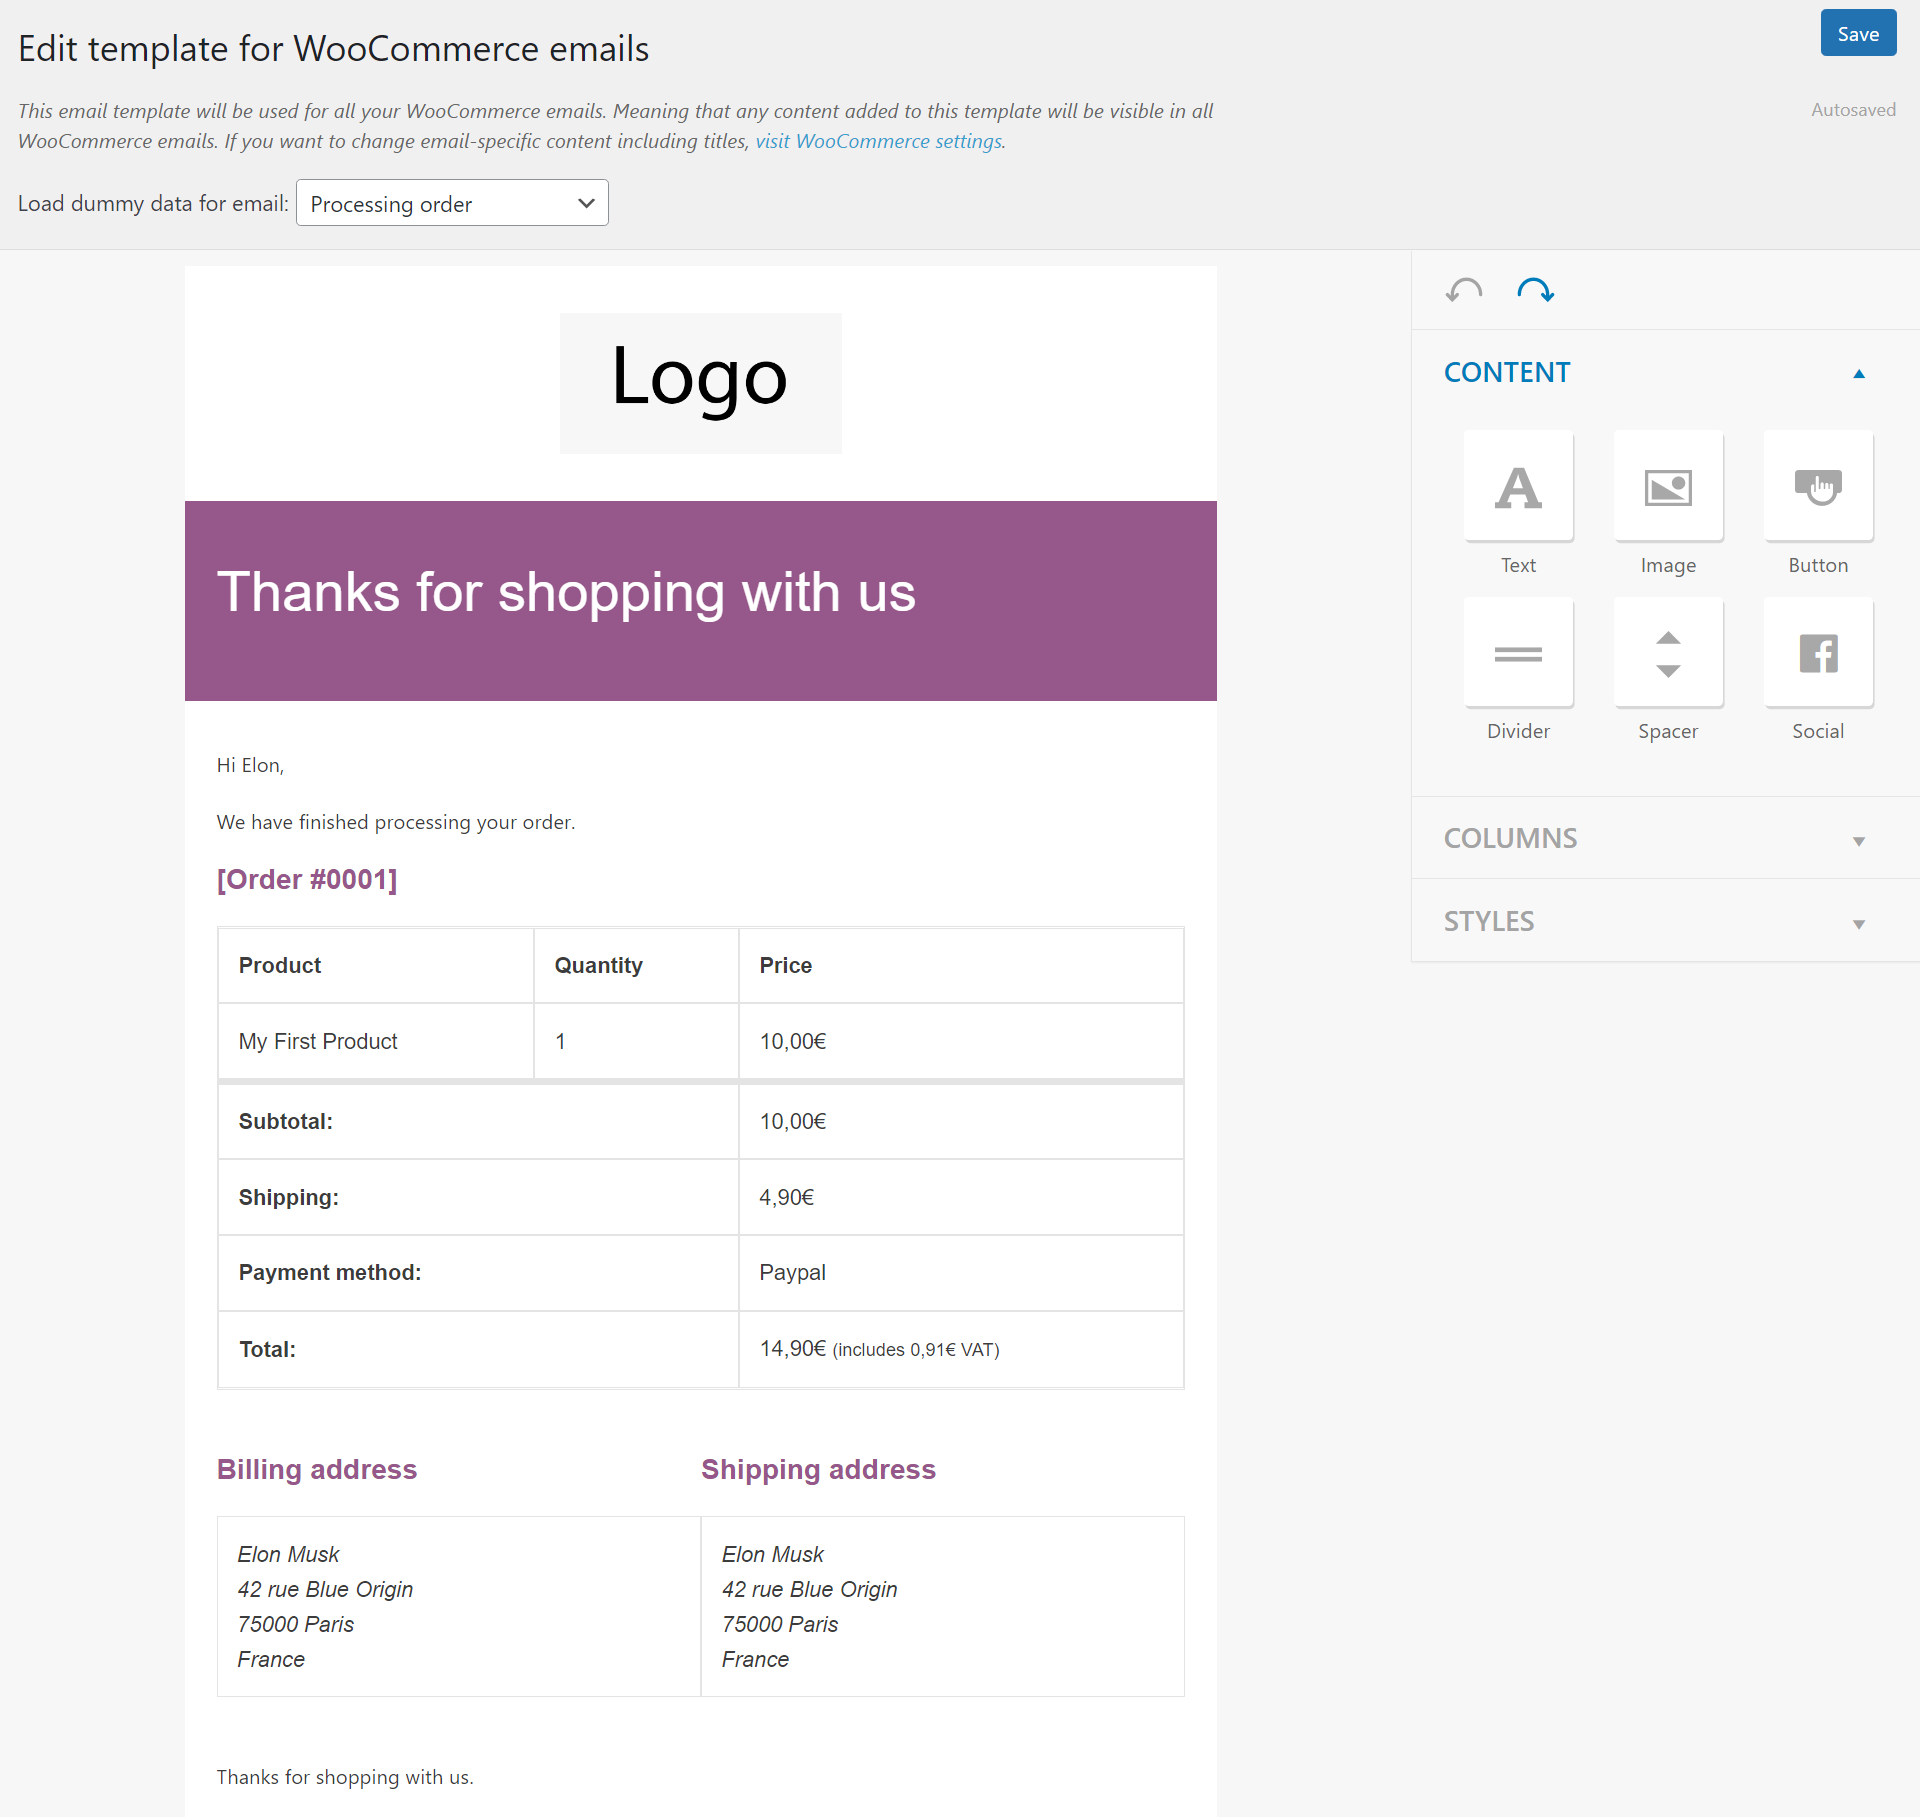
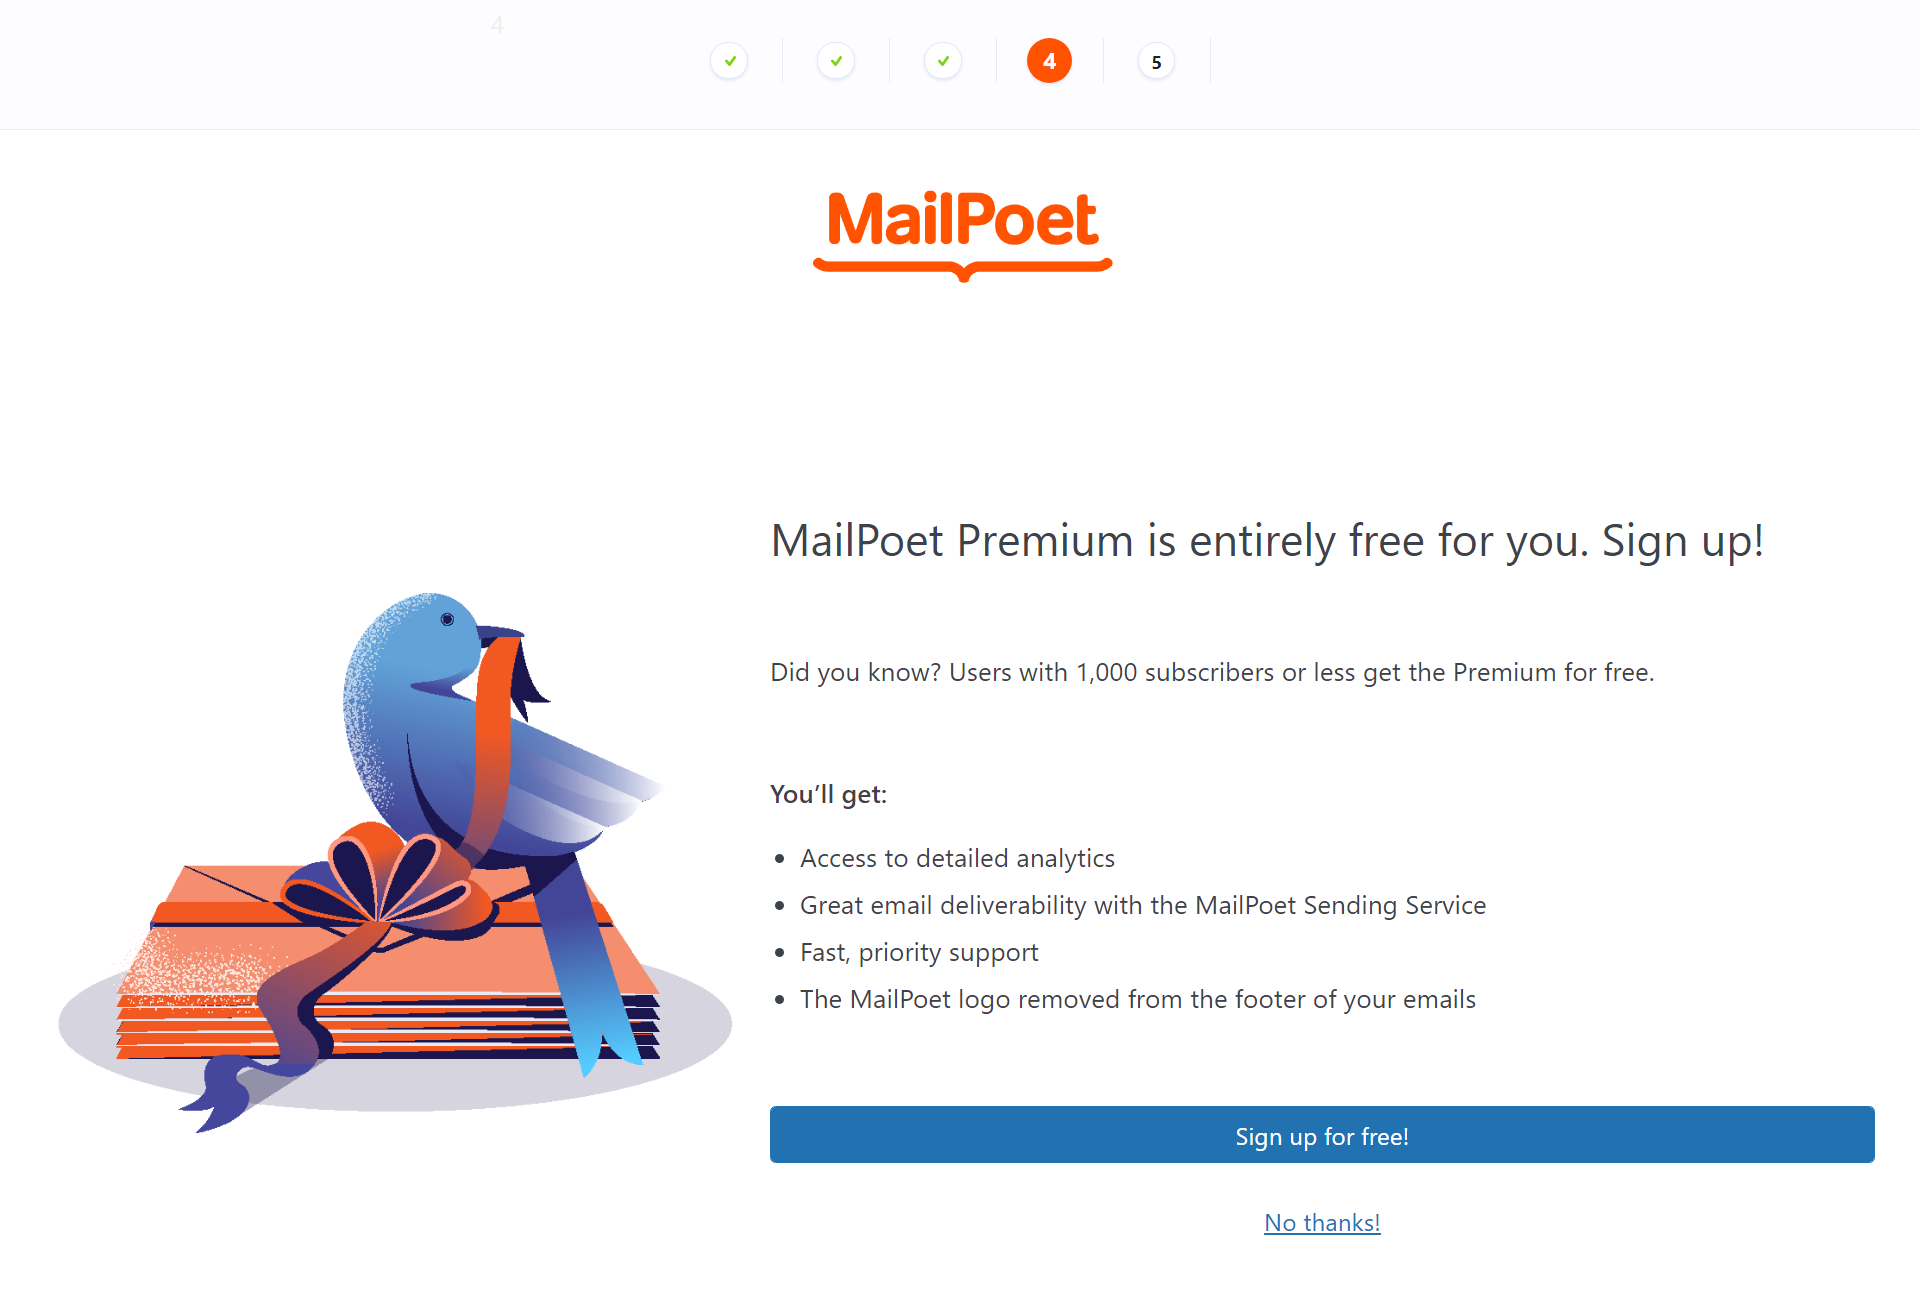
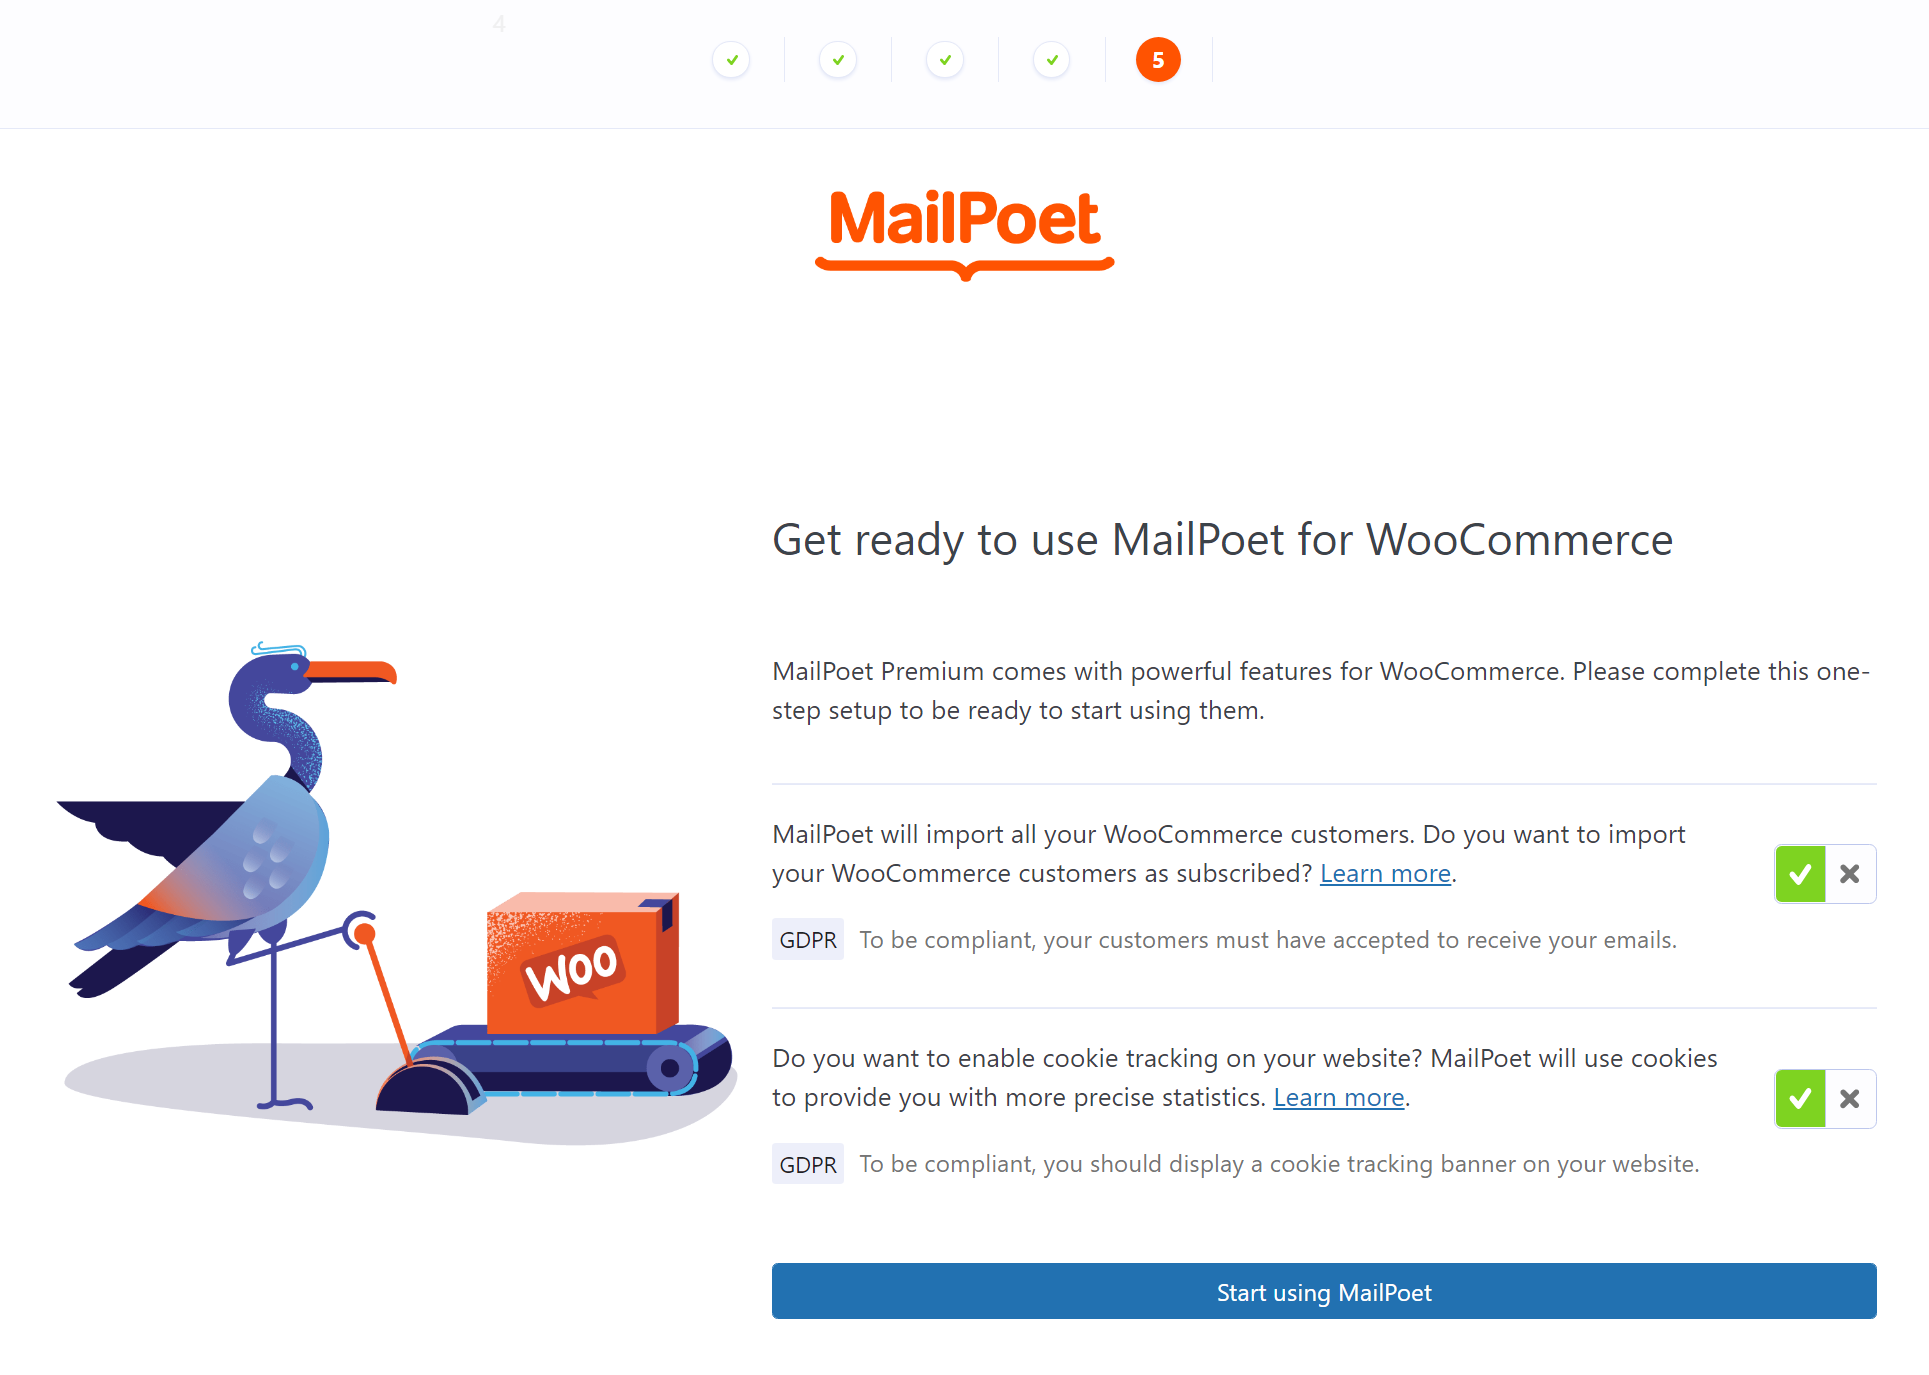
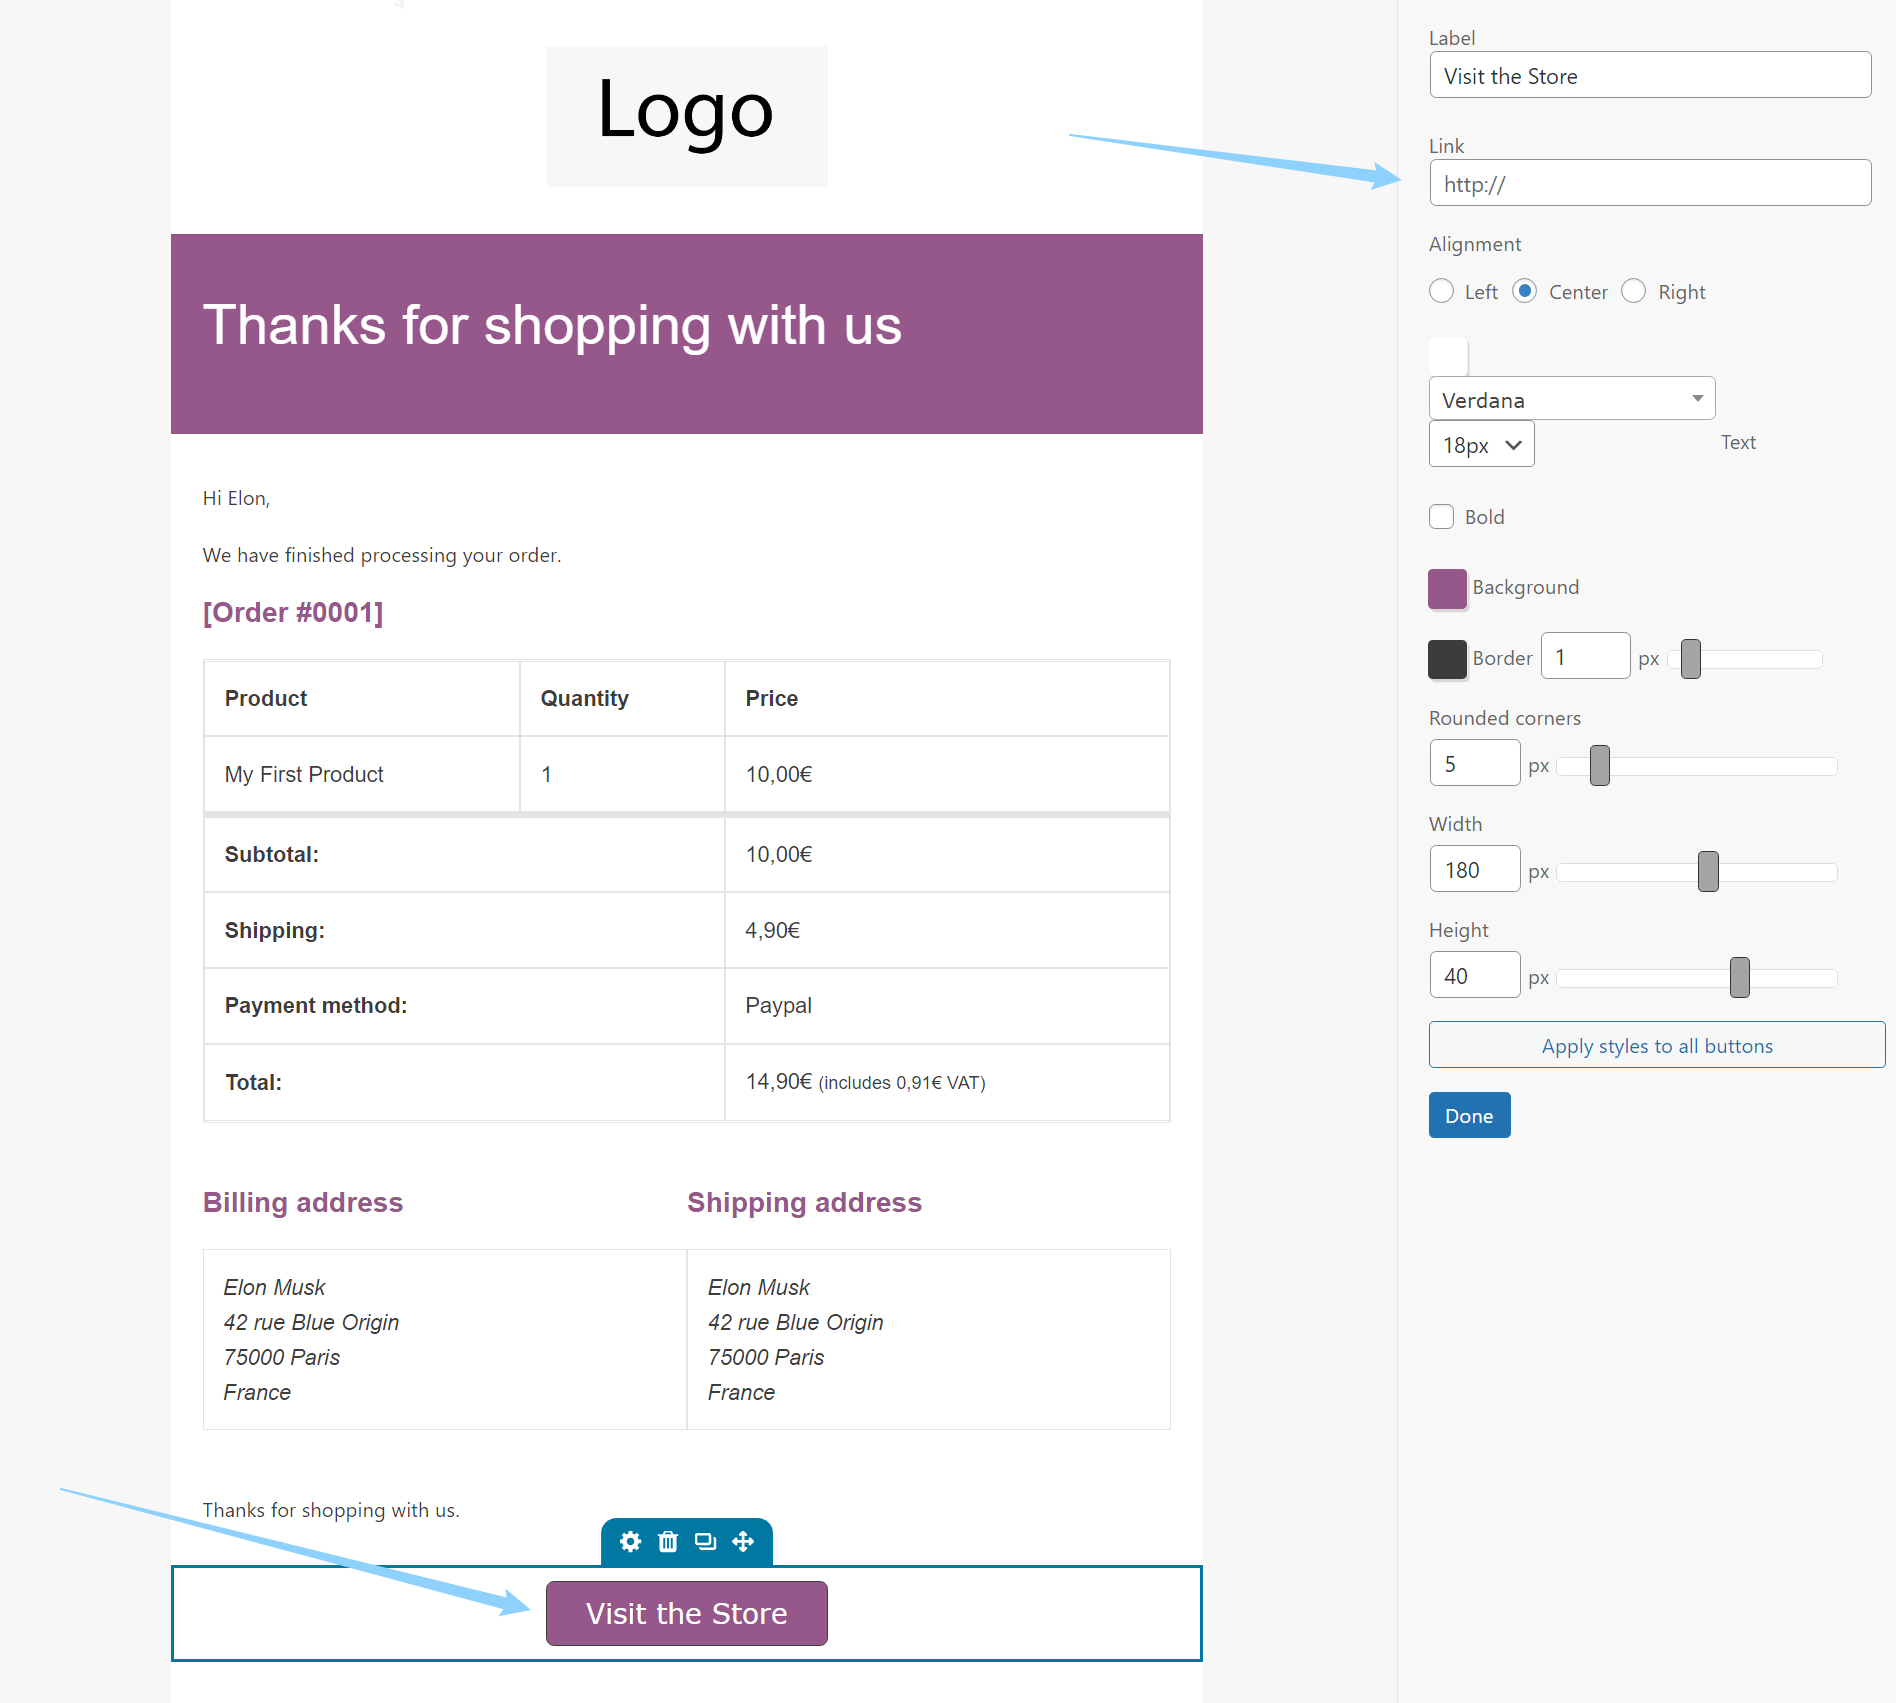
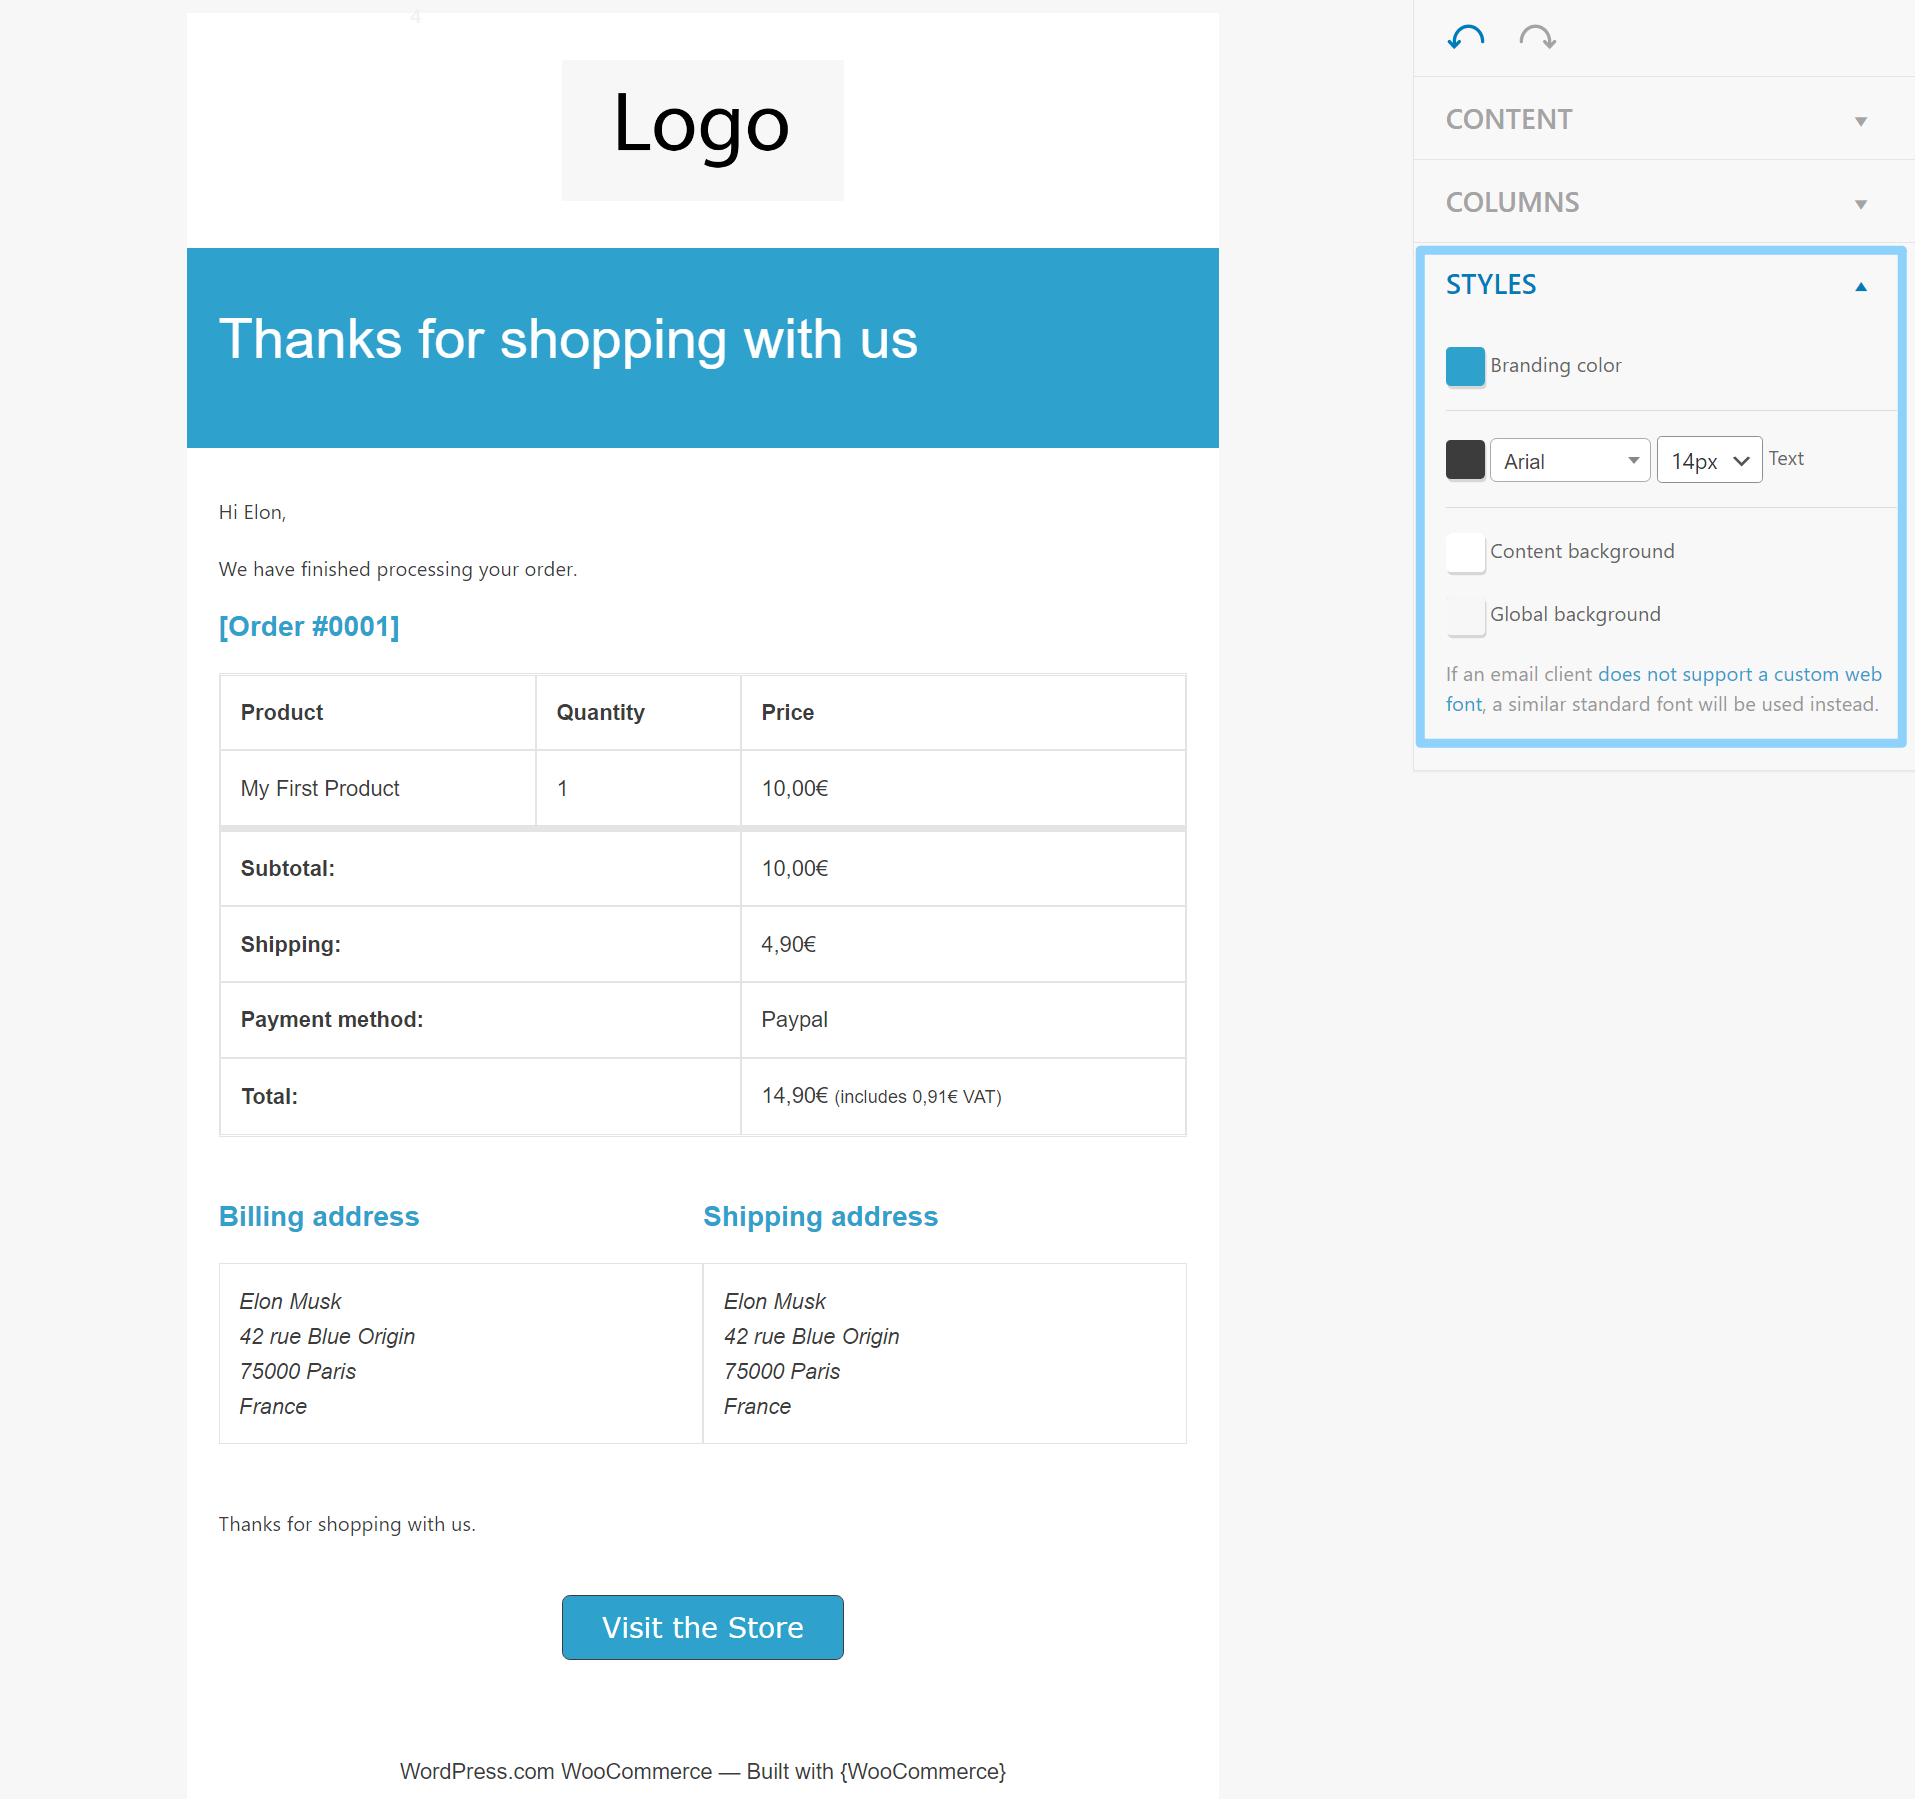
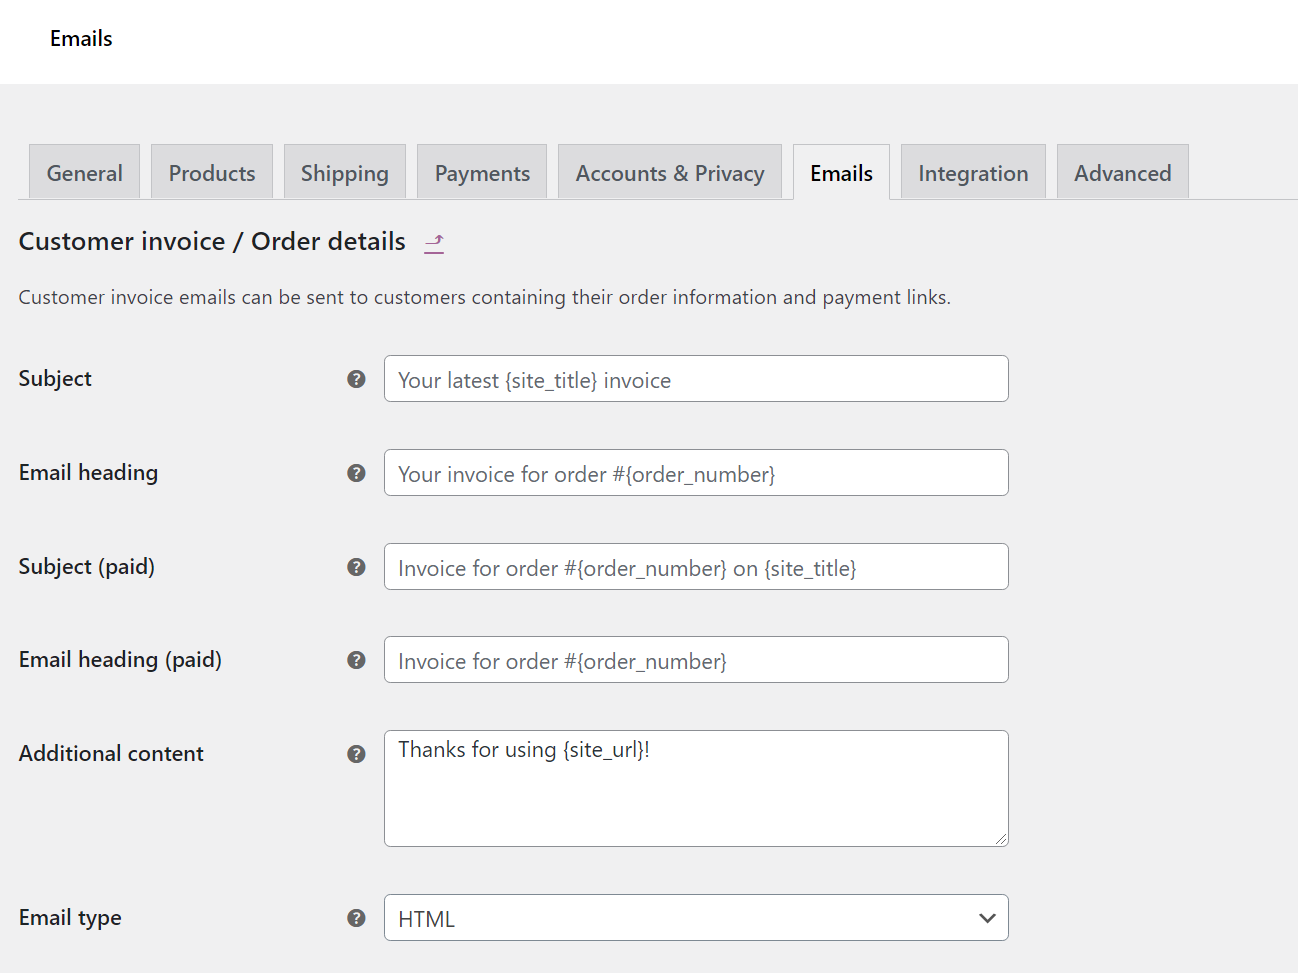